
There are three ways to share assistants with students in Show-Me AI.
Using the assistant admin dashboard
Through the assistant admin screen, you can share assistants directly to a group of students with ease. In a future feature upgrade, you will also have the ability to see each student’s prompts, as well as set categories to monitor key words or files.
- Email showmeai@missouri.edu to request a group be created for your class with access to the assistant admin screen.
Once you have access, navigate to the “Assistant” tab at the top of the left sidebar, and find your group folder. When you hover over the title, you will see a purple gear icon. Click on it to open in the assistant admin interface (See Fig. 1).
Image
Figure 1: The location of the purple gear icon when hovering over the desired group.
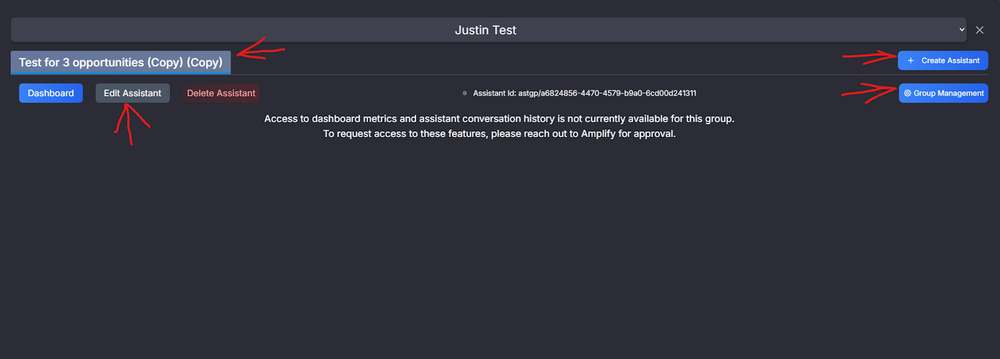
- You will now see tabs for each assistant you have created and shared with the group. You will also see a button to create additional assistants, as well as a button for group management.
You can edit your assistants right from this screen by clicking on the tab of the assistant you want to edit, then clicking “Edit Assistant” (See Fig. 2).
Image
Figure 2: The location of the “Edit Assistant” button on the assistant tab.
To ensure consistent results, you can enforce the use of a selected AI model for all users. This choice is one of the options available when creating or editing assistants for your class (See Fig. 3).
Image
Figure 3: The location of “Enforce Model” in assistant options.

Sharing an assistant with a URL
You can share your assistant to all your students with a custom URL. Users simply visit the URL to interact with the assistant. Conversations aren’t stored or saved in this format, however.
Create an assistant by navigating to the “Assistant” tab at the top of the left sidebar and selecting “Assistant.” Alternatively, to edit an existing assistant: navigate to the “Assistant” tab at the top of the left sidebar, click on the “Assistants” folder drop-down menu, hover your mouse over the desired assistant and click the “Edit Template” icon. (See Fig. 4)
Image
Figure 4: The location of the “Edit Template” icon when hovering over the desired assistant.
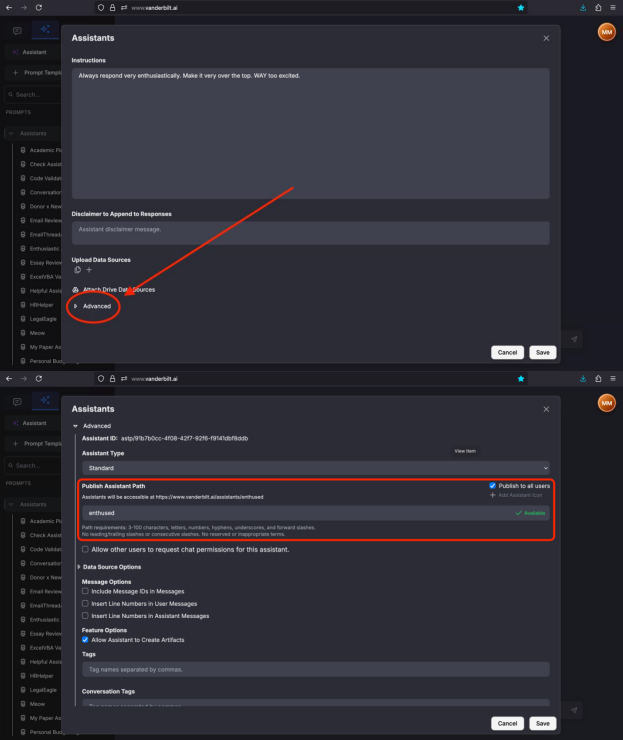
Scroll to the bottom of the pop-up and click “Advanced.” Scroll to the “Publish Assistant Path” section, and type in your desired URL path. Please note that paths taken by other users and paths containing inappropriate terms are not allowed.
Image
Figure 5: The locations of “Advanced” and “Publish Assistant Path” on the edit assistant screen.
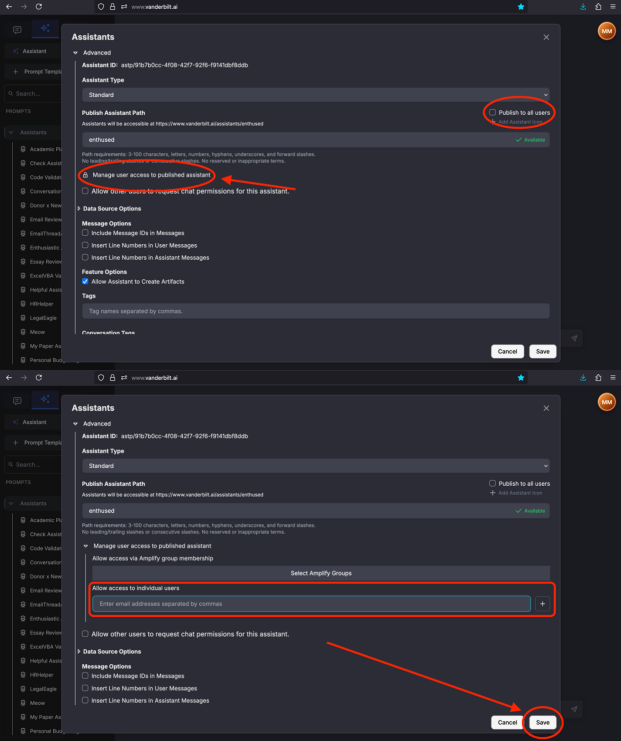
Clicking the save button will make this assistant available to all Show-Me AI users at the path you defined. You can restrict which users have access by unchecking “Publish to all users,” clicking “Manage user access to published assistant” and entering the email addresses of users you would like to have access to the assistant. Click “Save” when finished.
Image
Figure 6: The locations of fields that restrict assistant access to a defined set of users.
- Show-Me AI users can now visit the URL of the assistant you published and chat with it.
Sharing an assistant via the share button
The most basic method of sharing uses the share button. It may not be very practical in a classroom setting as it requires you to type in the email address of each person with whom you wish to share the assistant.
- Sharing in Show-Me AI provides directions to share assistants with others using the share icon.
- Refer to Show-Me AI: Accessing shared items for directions on how students can access what has been shared with them.